Connect your WEEX exchange account to TradingView with Flipr.Cloud. Follow these screenshots to create your API key, configure the Flipr.Cloud API connector and set up a webhook for your algo trading strategy.
Important WEEX trading notes
Before placing any trades on WEEX through Flipr.Cloud, read the important notes on partial take-profit, stop-loss and OCO. Read the WEEX trading notes
Before you start
Have your WEEX and Flipr.Cloud accounts ready, together with the TradingView strategy and alert you want to connect. TradingView requires two-factor authentication for webhook alerts.
STEP 1
Open API Keys in Flipr.Cloud
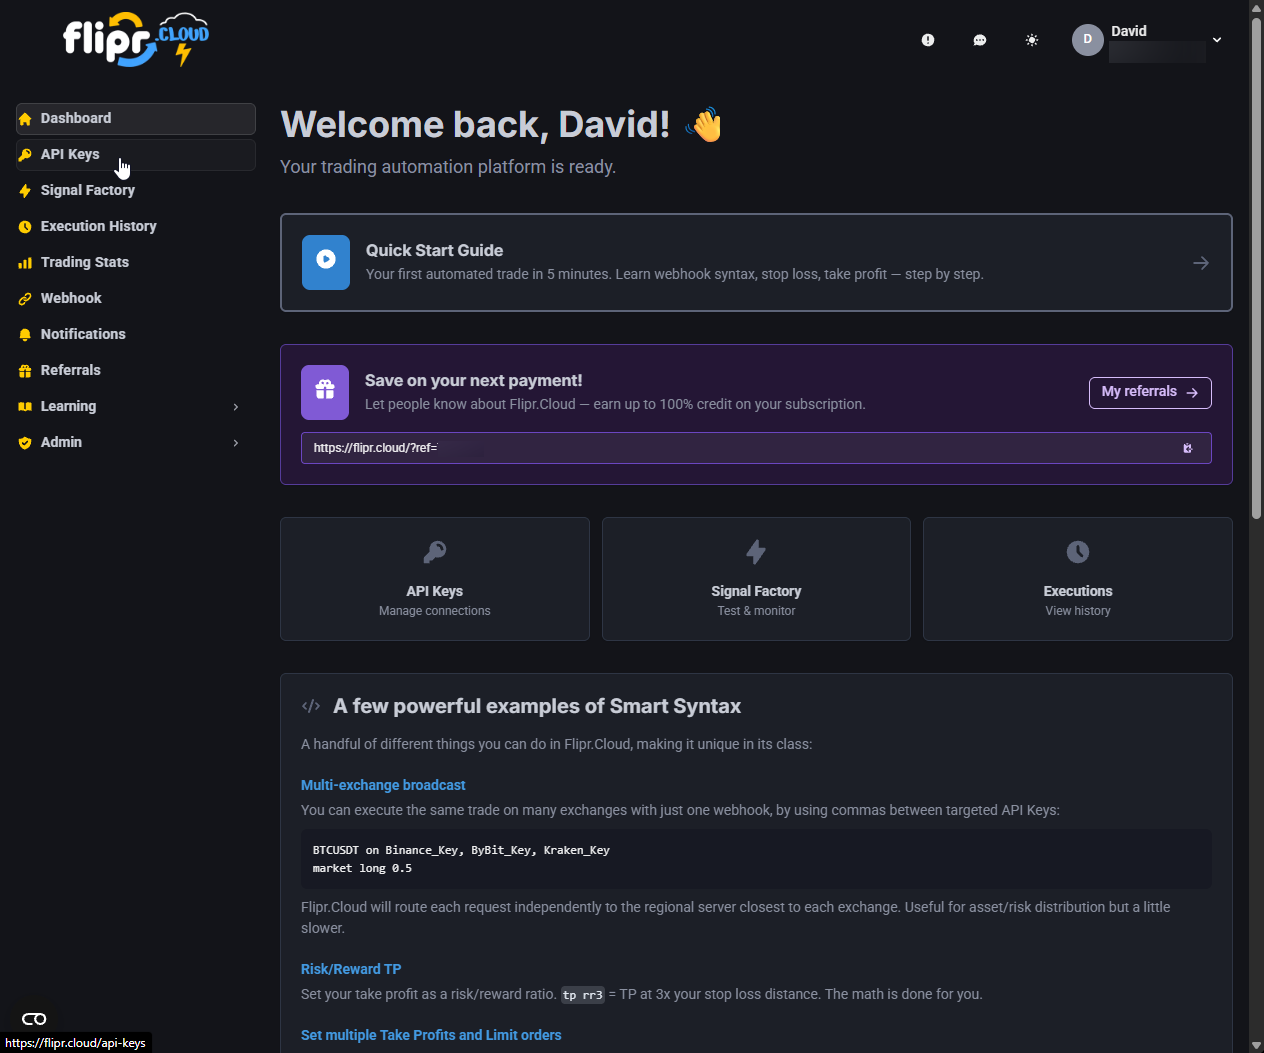
Start by logging in to your Flipr.Cloud account. From the dashboard, click API Keys in the left-hand sidebar to find the server IP you will need on WEEX.
STEP 2
Copy the Japan server IP
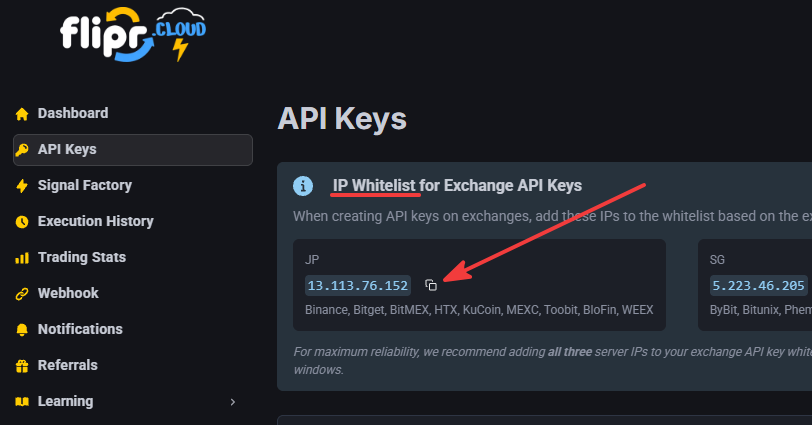
At the top of the API Keys page, find IP Whitelist for Exchange API Keys. Locate the JP card listing WEEX, then click the copy button beside the IP address. Keep this Flipr.Cloud tab open for later.
WEEX has its servers in Japan, so Flipr.Cloud uses its Tokyo data center for this connection. Flipr.Cloud uses a multi-region architecture to connect to each exchange from the closest available data center. This keeps the network path short and helps minimise latency between Flipr.Cloud and WEEX.
STEP 3
Open API Management on WEEX
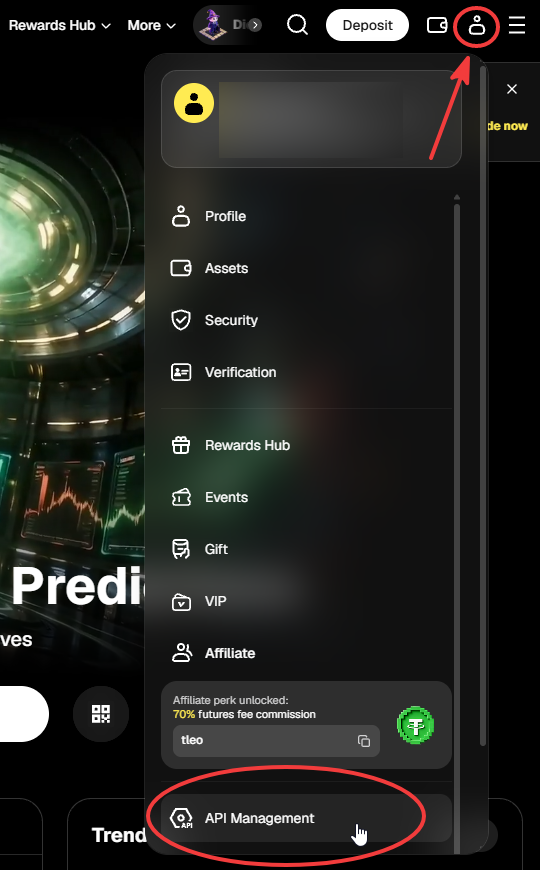
With the JP server IP copied, open the WEEX website in another tab and log in to your account. Open the account menu in the top-right corner, then select API Management.
STEP 4
Create a new API key
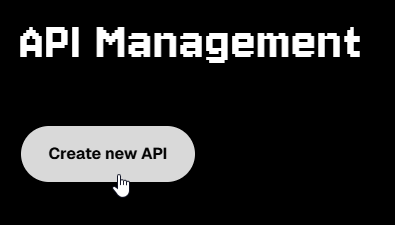
On the API Management page, click Create new API to start setting up your key.
STEP 5
Configure your API key
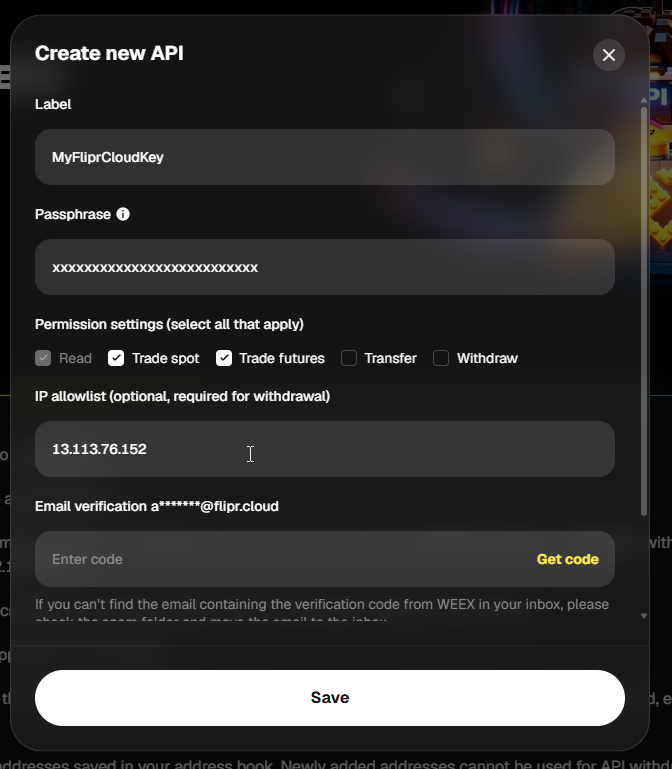
When the Create new API form opens, paste the JP server IP you already copied from Flipr.Cloud into IP allowlist.
Enter a recognisable name in Label and choose a Passphrase.
Under Permission settings, enable only Read and the trading permissions you need. Use Trade futures for futures trading; enable Trade spot only if needed.
Never enable Withdraw
Keep Withdraw and Transfer unchecked. This API key needs only Read and trading permissions; Transfer is not required for trading through Flipr.Cloud.
Important — Save your passphrase
Store your passphrase securely before continuing. You will need to enter the same passphrase when adding your WEEX API key to Flipr.Cloud. WEEX will not display it again after the key is created.
STEP 6
Complete verification and save
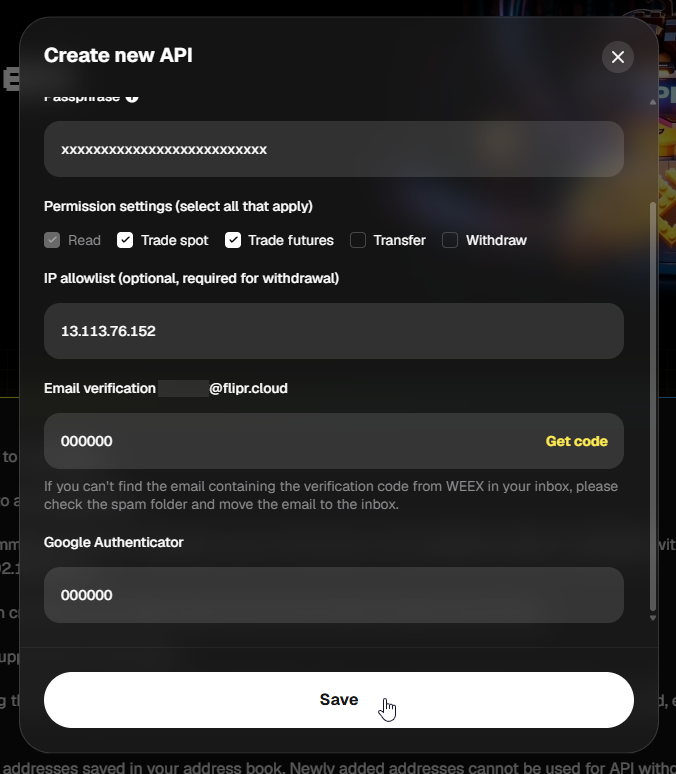
Check that you have entered and securely saved your Passphrase. Click Get code and enter the verification code sent to your email. Enter the current code from Google Authenticator, then click Save to create your API key.
Keep the API key and secret provided by WEEX available for the next step, along with the passphrase you saved earlier.
STEP 7
Add your WEEX API key to Flipr.Cloud
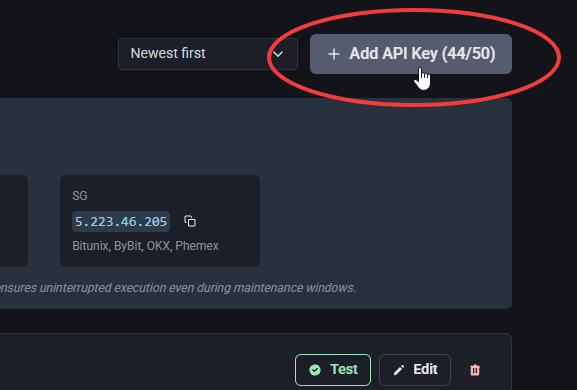
Return to the API Keys page in Flipr.Cloud and click Add API Key in the top-right corner.
STEP 8
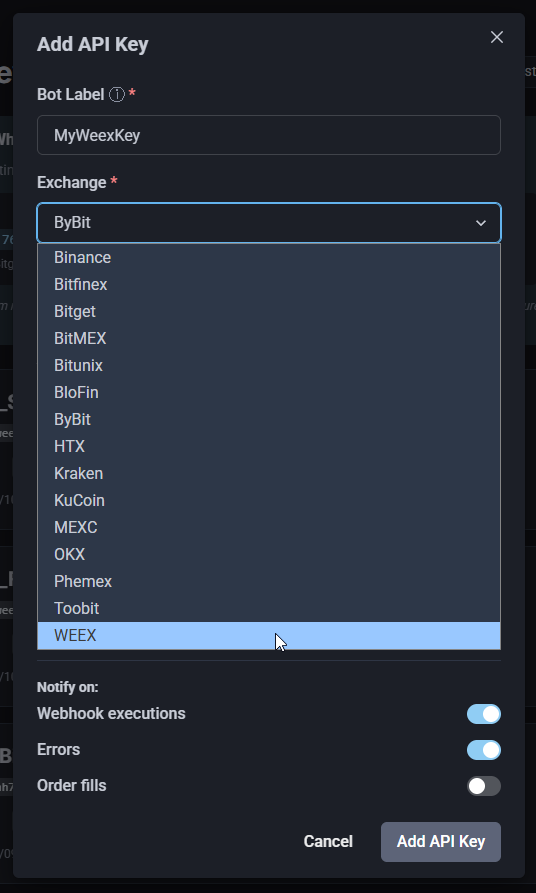
Name your connection and select WEEX
In the Add API Key window, enter a recognisable name in Bot Label, such as MyWeexKey. Open the Exchange dropdown and select WEEX.
STEP 9
Enter your WEEX credentials
Paste the API key and secret provided by WEEX into API Key and Secret Key. In Passphrase, enter the exact passphrase you saved when creating the key on WEEX.
Leave the other settings at their defaults, including Live/Mainnet for your live WEEX account. Click Add API Key to save the connection.
Under Notify on, you can choose Telegram alerts for this key: Webhook executions, Errors and Order fills. Webhook executions and Errors are enabled by default; Order fills is off. Connect your Telegram bot using the setup guide below to receive these alerts.
Flipr.Cloud also has separate email notifications for trading errors. The Notify on switches shown here control your Telegram alerts.
Telegram setup guide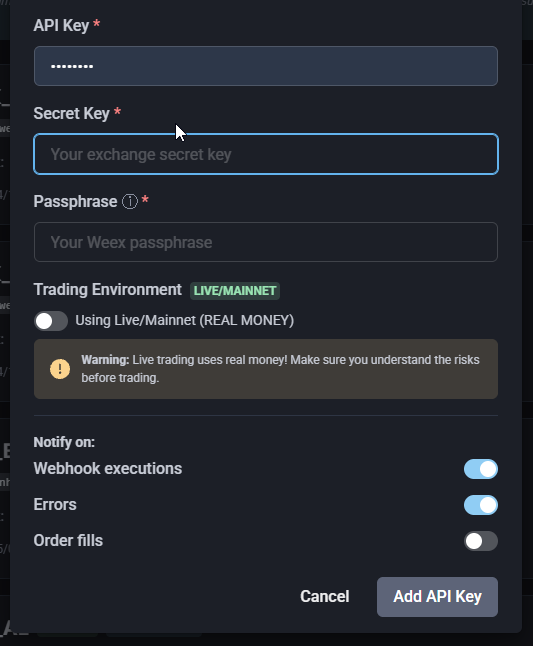
STEP 10
Test your WEEX connection
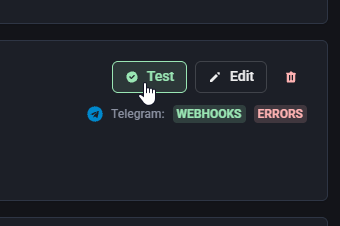
On your saved WEEX API key card, click Test. Flipr.Cloud checks your credentials and account access by retrieving your account balance from WEEX.
Wait for the Connection successful confirmation, then continue to the webhook setup.
STEP 11
Copy your webhook URL
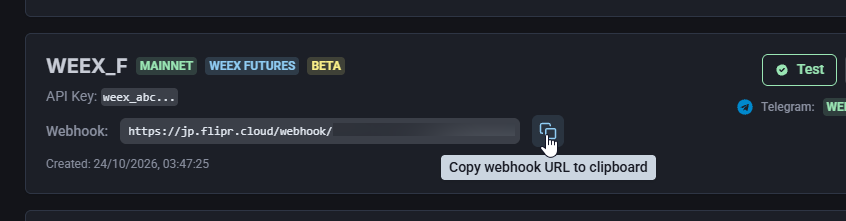
On the WEEX API key card you just created, find Webhook and click the copy button beside the URL. This is your personal Flipr.Cloud webhook URL for the WEEX connection.
Keep the copied URL ready. In the next step, you will paste it into your TradingView alert.
STEP 12
Open your TradingView strategy alert
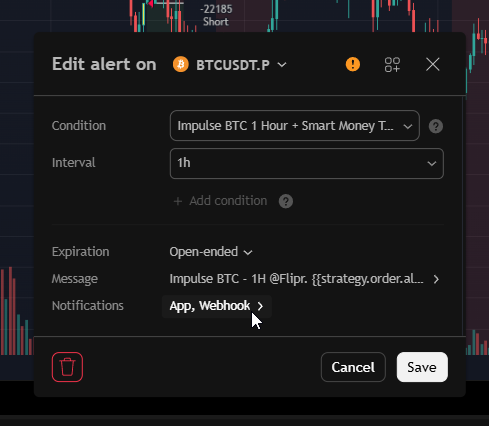
In TradingView, open the alert connected to the strategy you want to use. Check that Condition refers to the intended strategy, then open Notifications.
STEP 13
Paste your Flipr.Cloud webhook URL
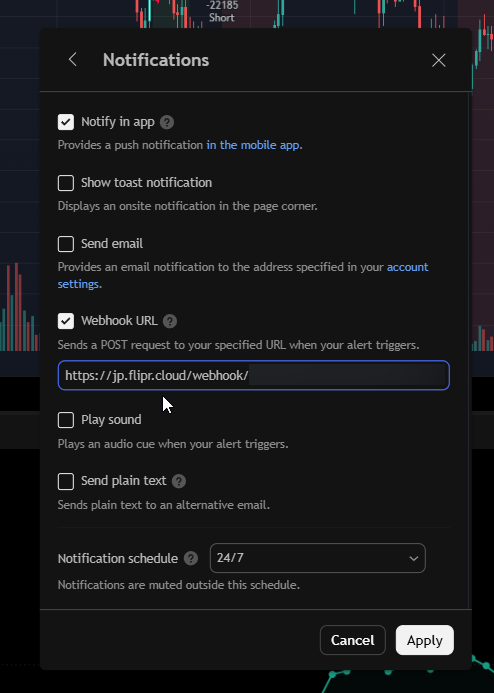
Enable Webhook URL and paste the complete URL you copied from your WEEX API key card in Flipr.Cloud.
Click Apply to return to the alert settings. Next, check the message your strategy will send.
STEP 14
Set the trading message and save your alert
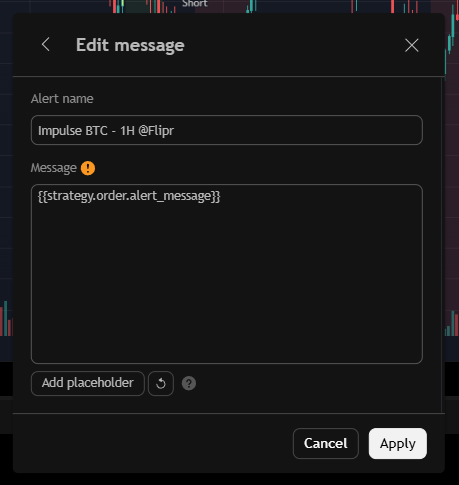
Open Message in the alert settings. The content depends on how your strategy is written in Pine Script: it may generate the trading message in its code, or require you to enter the message directly in TradingView.
If your strategy supplies custom order-fill messages through Pine Script’s alert_message parameter, enter {{strategy.order.alert_message}} in Message, as shown. TradingView replaces this placeholder with the message generated by the strategy when the order-fill alert triggers.
If your strategy expects a manually configured message, enter the appropriate Flipr.Cloud Smart Syntax commands directly in Message. Follow the strategy’s instructions for the alert condition and message. Strategies using alert() calls generate their messages in the script itself.
For the Smart Syntax reference and instructions on customising your trading messages, open the public Learning area.
Click Apply, then Save in the main alert window. When the saved alert triggers, TradingView sends its message to your Flipr.Cloud webhook URL.
Smart Syntax Reference